November 19, 2011

 Restart Computer Directly into “Safe Mode”


BootSafeXP is a Windows portable utility to quickly restart Windows XP in Safe Mode. Once started in Safe Mode, you will automatically restart in Normal Mode on the next reboot, unless you run BootSafeXP again while in Safe Mode. This helps you avoid continuously tapping the F8 while restarting the PC.

This utility may be run from a Flash drive, CD or other Portable Devises that means simply copy the BootSafeXP.exe to your portable medium.  


This utility may be work on other Microsoft Windows Versions. This requires standard VB6SP6 Runtime files so you can download from www.Microsoft.com most systems have these already, but if something isn't working properly, download them and try again. When using the installer package, these files are available and will be installed automatically.

Please click on the links below to download

Photobucket


Search Terms : How to, Windows XP, Vista, Windows 7, Boot Windows XP Into Safe Mode, Start Windows in Safe Mode, restart directly into Safe Mode, Start the computer in safe mode, Computer Will Only Boot in Safe Mode, restart the computer in Safe Mode, reboot computer in Safe mode, Restart Windows in Safe Mode, reboots when entering Safe Mode, Computer Boots Directly Into Safe Mode, Computer Starts Only in Safe Mode, Starting Windows XP in Safe Mode, PC Boots to Safe Mode only, boot up a computer in safe mode, Always boots into Windows safe mode


Category: Miscellaneous
Software : BootSafeXP

August 29, 2011

 How to Automatically Refresh System Screen


How to Automatically Refresh System Screen:

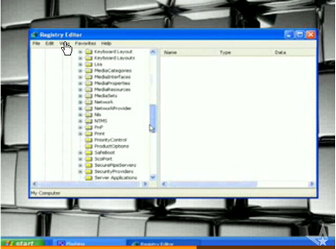
If you are working on a computer and want to make changes to refresh your computer system automatically. For example, some times you watch sports scores, stock quotes, online exchanges and any changes to your computer system, but these changes are normally when the contents of a window change you may need to wait a few seconds, or press the F5 key on your keyboard. To refresh your screen automatically, you must edit your windows registry.

Follow the given steps to refresh the screen automatically.
First Click Start Button >  and then click Run.
Run box will appear.
In the Run box, type regedit and then click OK.
Then locate the following key in the registry
HKEY_LOCAL_MACHINE\SYSTEM\CurrentControlSet\Control\Update


In the right side panel choose the “UpdateMode” and double click the DWORD value


Set it to the DWORD Value between 1 and 5 > Click OK Button.
Close the registry editor.
You'll need to reboot your computer before the changes take effect.


That's all.

CAUTION! : It is recommends that before you attempt to use the registry editor, make sure that you back up the whole registry or export the registry keys in the registry that you plan to edit. Incorrectly editing the registry may damage your system. Use Registry Editor at your own risk, we cannot guarantee that you can solve problems that result from using Registry Editor incorrectly.

Category: Registry Tweaks
Operating System : Windows

 Automatically Refresh System Screen - Video


This video will show you How to Automatically Refresh Your System Screen 

If you're having trouble playing videos, we suggest you to install the latest version of the Adobe Flash player.

If you're seeing the "You need to upgrade your Adobe Flash Player to watch this video / Missing Plug-in" error,

First you can upgrade the latest version of “Adobe Flash Player” after that view/play video’s.

Get the latest Adobe Flash Player (Download Adobe Flash Player)
Your Ad Here